All Categories
Featured
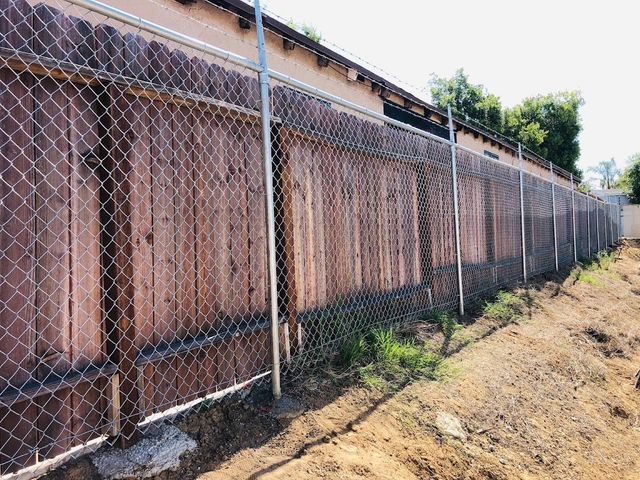
A leaning or damaged fence blog post can be both an eyesore and a safety and security concern. Over time, climate problems, dirt changes, or even the all-natural aging of materials can trigger a fencing blog post to lean or break.
![]()
Shovel. Post hole miner (optional for much deeper openings) Degree. Concrete mix (quick-setting is perfect) Gravel (for drainage, optional) Sledgehammer or article puller (for stubborn articles) If strengthening the blog post), a 2x4 support (. Security safety glasses and gloves. Having all these materials prepared will make the task easier and quicker.
Concrete: One of the most effective methods to safeguard a message is by pouring concrete around the base. Mix quick-setting concrete according to the directions on the bag, then pour it around the message, making certain the message continues to be straight and degree.
Crushed rock: If you prefer a simpler, a lot more adaptable choice, you can make use of crushed rock around the post for much better drainage and assistance. Fill up the hole with crushed rock, making sure the message is straightened properly.
Step 1: Remove the old, broken message. If the post is set in concrete, use an article puller or sledgehammer to loosen up the concrete and get rid of the blog post. Action 2: Once the message is eliminated, dig a brand-new opening if required. The hole should be about 2-3 feet deep, depending upon the size of your new post and the sort of dirt you're functioning with. Action 3: Put the new article right into the opening, making certain that it is degree and straightened with the remainder of the fence blog posts. Step 4: Load the opening with concrete or crushed rock as explained previously, ensuring that the new post is securely anchored. 7. Add Assistance Braces (Optional) You can include a support to supply additional support if you're worried regarding the future security of the post. Connect a 2x4 or comparable item of timber to the message at a diagonal angle, protecting the various other end to a neighboring fence article or the ground. This will prevent any type of future leaning and provide the article a lot more structural integrity while the concrete cures or crushed rock clears up.
![]()
Final thought. Repairing a leaning or harmed fence blog post doesn't need to be a complicated task. By complying with these straightforward steps-- assessing the damage, digging around the article, and enhancing it with concrete or gravel-- you can restore your fence post to its upright setting. If the post is beyond fixing, changing it with a brand-new one is the best solution. With regular maintenance and regular checks, you can guarantee your fence stays durable and safe and secure for several years to come.
- Analyze the Damages. Before leaping into fixings, take a good consider the issue. If your fence blog post is leaning, it could simply require to be straightened and strengthened. If the message is decayed, broken, or broken, it might need replacing. Examine the blog post for indicators of rot, specifically at the base. Check the surrounding soil to see if erosion or shifting ground is the cause of the leaning.
- Gather Necessary Equipment and Products. To deal with the message, you'll require a couple of fundamental devices and materials:
Shovel. Post hole miner (optional for much deeper openings) Degree. Concrete mix (quick-setting is perfect) Gravel (for drainage, optional) Sledgehammer or article puller (for stubborn articles) If strengthening the blog post), a 2x4 support (. Security safety glasses and gloves. Having all these materials prepared will make the task easier and quicker.
- Dig Around the Base of the Message. To deal with the leaning blog post, you'll need to expose the base of the message. Beginning by digging around it making use of a shovel. Develop an opening that goes to the very least 12 inches broad and 18-24 inches deep. The goal is to loosen up the dirt bordering the article so you can rearrange or secure it effectively. If the article is deeply embedded in concrete, you might require to dig much deeper or make use of a message puller to remove it.
- Align the Article. As soon as the base of the blog post is revealed, it's time to correct it. Utilize a level to make sure the message is upright, changing it as needed.
- Reinforce the Message. As soon as the blog post remains in the proper placement, you'll need to strengthen it to stop it from leaning once more. You can do this in a number of means:
Concrete: One of the most effective methods to safeguard a message is by pouring concrete around the base. Mix quick-setting concrete according to the directions on the bag, then pour it around the message, making certain the message continues to be straight and degree.
Crushed rock: If you prefer a simpler, a lot more adaptable choice, you can make use of crushed rock around the post for much better drainage and assistance. Fill up the hole with crushed rock, making sure the message is straightened properly.
- If Required), replace a Damaged Article (. If the message is significantly decomposed or damaged, fixing it might not be possible. In this instance, replacing the message is your best option. Right here's exactly how to replace a damaged fencing message:
Step 1: Remove the old, broken message. If the post is set in concrete, use an article puller or sledgehammer to loosen up the concrete and get rid of the blog post. Action 2: Once the message is eliminated, dig a brand-new opening if required. The hole should be about 2-3 feet deep, depending upon the size of your new post and the sort of dirt you're functioning with. Action 3: Put the new article right into the opening, making certain that it is degree and straightened with the remainder of the fence blog posts. Step 4: Load the opening with concrete or crushed rock as explained previously, ensuring that the new post is securely anchored. 7. Add Assistance Braces (Optional) You can include a support to supply additional support if you're worried regarding the future security of the post. Connect a 2x4 or comparable item of timber to the message at a diagonal angle, protecting the various other end to a neighboring fence article or the ground. This will prevent any type of future leaning and provide the article a lot more structural integrity while the concrete cures or crushed rock clears up.
- Look For Future Stability. When the post is dealt with or changed, check it occasionally to make sure that it continues to be secure and upright. Inspect the bordering dirt for disintegration or changing, and address any issues quickly to stop more damages.

Final thought. Repairing a leaning or harmed fence blog post doesn't need to be a complicated task. By complying with these straightforward steps-- assessing the damage, digging around the article, and enhancing it with concrete or gravel-- you can restore your fence post to its upright setting. If the post is beyond fixing, changing it with a brand-new one is the best solution. With regular maintenance and regular checks, you can guarantee your fence stays durable and safe and secure for several years to come.
Latest Posts
Learn How WyHy Federal Credit Union Maximizes Your Savings on Borrowing and Banking
Published May 27, 25
1 min read
Improve Your Home's Exterior with Weathercraft's Exterior siding Solutions
Published May 25, 25
1 min read
Unlock WyHy FCU – Key Advantages for Your Future
Published May 25, 25
1 min read